
Yoga for Beginners at Home: A Practical, Safe Guide to Starting Your Practice
Estimated Reading Time: 8 minutes
Key Takeaways:
- You do not need high flexibility, expensive gear, or hours of time; a simple 10-to-20-minute gentle routine at home is enough to begin.
- Practicing alone increases the risk of mild strains or sprains, making proper alignment, mindful pacing, and avoiding high-risk poses essential.
- Scientific evidence confirms yoga’s modest benefits for low-back pain, neck pain, osteoarthritis, and balance, while broader claims about stress and well-being show mixed results.
- Beginners should steer clear of advanced inversions, full lotus, extreme backbends, and forceful breathing exercises.
Table of Contents:
- What Yoga Actually Is (and Why Style Matters)
- What the Science Says: Realistic Health Benefits
- Setting Up Your Space and Choosing Basic Equipment
- A Gentle 10-to-20-Minute Routine for Beginners
- 1. Centering and Seated Breathing (2–3 Minutes)
- 2. Cat-Cow Stretch (5–8 Breath Cycles)
- 3. Child’s Pose (3–5 Breaths)
- 4. Supported Low Lunge (3–5 Breaths per Side)
- 5. Mountain Pose (Tadasana) (3–5 Breaths)
- 6. Gentle Standing Forward Fold with Bent Knees (3–5 Breaths)
- 7. Relaxed Resting Pose (3–5 Minutes)
- Poses and Practices Beginners Should Avoid
- Common Beginner Mistakes and How to Fix Them
- Special Considerations: When to Seek Professional Guidance
- Progressing Your Practice at Home
- Frequently Asked Questions
- Taking Your First Step
Starting yoga for beginners at home often feels intimidating. Between photos of experienced practitioners bending backward and video titles promising intense full-body transformations, it is easy to assume you need high flexibility, expensive studio props, or an hour of free time just to begin.
You do not need any of those things. Beginners can start practicing at home with a modest, gentle sequence taking 10 to 20 minutes on a cleared section of floor. However, practicing independently comes with real considerations: data reviewed by the National Center for Complementary and Integrative Health (NCCIH) shows that practicing yoga alone without qualified supervision is associated with an increased risk of injury. Most injuries are mild—primarily joint sprains and muscle strains—but learning proper alignment early helps you avoid unnecessary pain and build a sustainable habit.
Understanding how to set up your space, which movements to focus on, which poses to skip, and what the scientific research actually says about yoga’s health effects will set you up for success.
What Yoga Actually Is (and Why Style Matters)
Yoga is not a single, uniform workout. It is an ancient mind-body practice that combines physical postures (asanas), controlled breathing techniques (pranayama), and often elements of meditation or relaxation. Because the term “yoga” covers dozens of different approaches, picking a class or video at random can lead to unexpected challenges.
Styles differ dramatically in pace, physical demand, and room temperature:
- Gentle or Hatha Yoga: These practices move at an unhurried tempo, holding basic postures for several breaths while focusing on alignment and physical sensations. They serve as an ideal entry point for home practice.
- Vinyasa or Flow Yoga: Postures link together fluidly with the breath. While rewarding, the rapid transitions between poses make it harder for a novice to check their form or adjust safely.
- Power or Ashtanga Yoga: These athletic, vigorous styles require significant muscular endurance, wrist strength, and cardiovascular output.
- Hot Yoga: Practiced in rooms heated up to 105°F, this style increases cardiovascular demand and carries specific safety risks, especially for pregnant individuals or anyone sensitive to heat illness.
For anyone starting at home, a slow-paced, beginner-oriented class is far more appropriate than an advanced or athletic style. NCCIH guidance specifically advises beginners to steer clear of extreme physical positions and forceful breathing exercises. Your primary goal early on is simply learning how your joints and muscles respond to gentle, supported movement.
What the Science Says: Realistic Health Benefits
Yoga is often marketed as a cure-all for modern ailments, but the underlying science offers a more measured perspective. Research shows distinct, meaningful benefits for specific concerns, alongside areas where the evidence remains preliminary or mixed.
Where the Evidence Shows Promise
According to research summaries from the NCCIH, yoga can be a supportive intervention for several common musculoskeletal and neurological complaints:
- Low-Back Pain: Several clinical trials suggest that yoga may provide a modest, short-term reduction in low-back pain and related disability, functioning similarly to other guided physical therapies.
- Neck Pain and Headaches: Studies indicate yoga may help alleviate tension-type headaches, migraines, and chronic neck discomfort by reducing muscular guarding and improving posture.
- Knee Osteoarthritis: Gentle movement helps maintain joint range of motion and leg strength, offering modest pain relief for some people with mild-to-moderate knee osteoarthritis.
- Balance and Fall Prevention: Practicing balance-focused postures helps older adults and sedentary individuals develop lower-body stability and joint proprioception (spatial awareness).
Areas with Mixed or Limited Evidence
Claims regarding stress relief, sleep quality, and general mental well-being are common, yet the NCCIH notes that scientific findings on general well-being are not completely consistent across trials. While many people report subjective improvements in their daily stress levels and mood after practicing, study designs vary widely, making broad conclusions difficult.
Yoga should never be treated as a stand-alone cure or a substitute for conventional medical care, clinical mental health therapy, or prescribed rehabilitation. Approaching your home practice as a supportive physical and mental routine—rather than medical treatment—keeps expectations realistic and safe.
Setting Up Your Space and Choosing Basic Equipment
You do not need a dedicated studio or specialized gear to practice yoga at home. You only need a secure, quiet environment that allows uninhibited movement.
| Item | Function & Low-Cost Alternatives |
|---|---|
| Floor Surface | Hardwood, laminate, or thin commercial carpet. Avoid loose rugs or slick, highly polished surfaces. |
| Yoga Mat | Provides cushioning for joints and traction for hands and feet. Non-slip grip is the most important factor. |
| Folded Blanket or Bath Towel | Elevates the hips in seated poses; cushions sensitive knees during kneeling movements. |
| Yoga Blocks (or Sturdy Books) | Bring the floor closer to your hands in lunges and forward bends. Reduces strain on the lower back. |
| Sturdy Chair | Provides balance support during standing postures or serves as a seat for modified mobility work. |
Wear non-restrictive clothing that lets you bend and extend your limbs without catching. Practicing barefoot is generally best because bare soles offer immediate traction on your mat and allow the small stabilizing muscles in your feet and ankles to engage naturally.
A Gentle 10-to-20-Minute Routine for Beginners
The following foundational sequence introduces basic spinal mobility, gentle hip opening, and grounded standing balance. This sequence is an editorial example rather than a clinically validated prescription. Move slowly, breathe continuously through your nose if comfortable, and pause or exit any pose if you encounter sharp pain, pinching, or dizziness.
Seated Breathing  -->  Cat-Cow Stretch  -->  Child's Pose
       |
       v
   Low Lunge      -->  Mountain Pose    -->  Gentle Forward Fold  -->  Relaxed Resting Pose
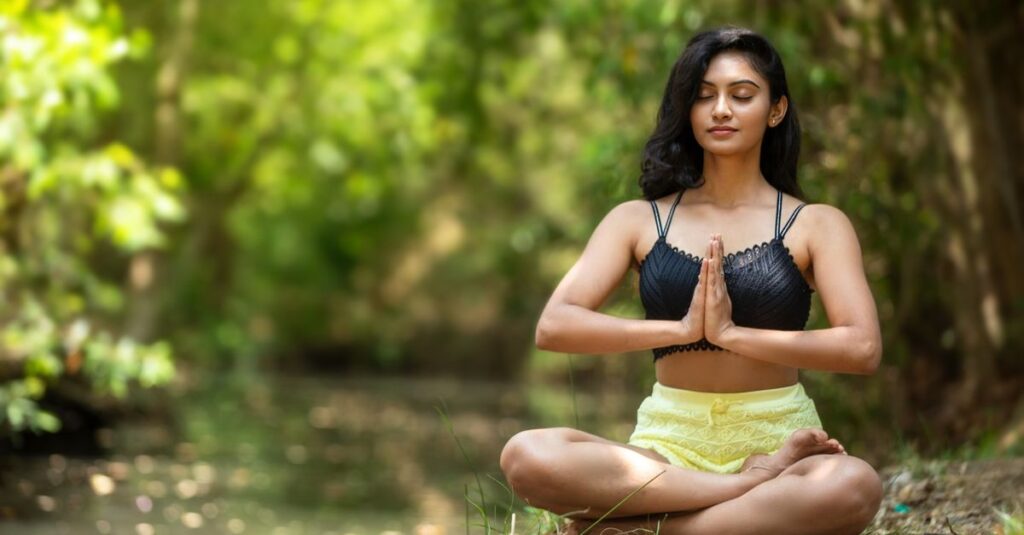
1. Centering and Seated Breathing (2–3 Minutes)
Sit cross-legged on the floor or upright on the front edge of a firm chair. If sitting on the floor, place a folded blanket under your sit bones so your hips rest slightly higher than your knees; this prevents your lower back from rounding outward.
- How to do it: Rest your hands on your thighs. Close your eyes or soften your gaze downward. Draw your shoulders back and downward away from your ears, lengthening through the crown of your head. Inhale smoothly through your nose for a count of three, feeling your ribs expand outward, and exhale smoothly through your nose for a count of three.
- Why it helps: Settles your attention, calms your resting heart rate, and establishes the steady breathing rhythm you will use throughout movement.
- Modification: If your hips or knees ache, sit tall on a dining chair with your feet flat on the floor.
2. Cat-Cow Stretch (5–8 Breath Cycles)
Transition onto your hands and knees in a tabletop position. Place your wrists directly under your shoulders and your knees directly under your hips. Spread your fingers wide to distribute your weight evenly across your palms.
- How to do it: On an inhale, gently drop your belly toward the mat, roll your shoulders back, and lift your chest and gaze slightly forward (Cow Pose). On an exhale, press firmly into your palms, round your spine toward the ceiling, tuck your tailbone, and let your head release naturally downward (Cat Pose).
- Why it helps: Mobilizes the entire spinal column, eases tension in the back muscles, and coordinates movement with breath.
- Modification: If your wrists ache, place your forearms on blocks or make loose fists to keep your wrists straight. Place an extra towel under your knees if the floor feels too hard.
3. Child’s Pose (3–5 Breaths)
From tabletop, bring your big toes together and widen your knees toward the edges of your mat.
- How to do it: Send your hips backward toward your heels. Walk your hands forward along the floor until your torso rests comfortably between or on your thighs. Rest your forehead on the mat, a block, or folded hands. Keep your arms relaxed.
- Why it helps: Gently stretches the hips, thighs, and lower back while giving your nervous system a calm rest.
- Modification: If your hips do not reach your heels, place a rolled towel behind your knees, or widen your knees further.
4. Supported Low Lunge (3–5 Breaths per Side)
Return to tabletop. Step your right foot forward between your hands so your right knee stacks directly over your ankle. Keep your left knee resting on the floor behind your hips.
- How to do it: Place your fingertips on the floor or rest both hands on yoga blocks on either side of your front foot. Keep your torso long rather than slouching over your knee. Gently sink your hips downward and forward until you feel a mild, comfortable stretch along the front of your left hip and thigh. Hold, breathing steadily, then step back to tabletop and switch sides.
- Why it helps: Releases tight hip flexors caused by prolonged sitting.
- Modification: Place a folded blanket beneath your back knee for joint cushioning. If the floor feels too distant, rest your hands on the seat of a sturdy chair positioned in front of you.
5. Mountain Pose (Tadasana) (3–5 Breaths)
From your lunge, step forward and slowly roll or hinge up to standing.
- How to do it: Stand with your feet hip-width apart, parallel to one another. Distribute your body weight evenly between your heels and the balls of your feet. Engage your thigh muscles lightly without locking your knees backward. Drop your shoulders down and let your arms hang naturally at your sides, palms facing forward.
- Why it helps: Establishes foundational standing posture, balances joint alignment, and builds body awareness.
- Modification: Stand with your back lightly touching a wall to feel what a neutral, upright spine feels like from your heels to your shoulder blades.
6. Gentle Standing Forward Fold with Bent Knees (3–5 Breaths)
From Mountain Pose, place your hands on your hips.
- How to do it: Take a soft bend in both knees. Hinge forward at your hip joints—not your waist—allowing your torso to drape over your thighs. Release your hands toward the floor, your shins, or a pair of blocks. Let your neck relax so the crown of your head points down.
- Why it helps: Decompresses the lumbar spine and stretches the hamstrings without placing excessive leverage on the lower back.
- Common error: Keeping the legs completely straight. Forcing straight legs pulls on the pelvis and rounds the lumbar spine, which can strain lower-back ligaments. Keep your knees visibly bent.
7. Relaxed Resting Pose (3–5 Minutes)
Lie flat on your back on your mat.
- How to do it: Let your feet fall open naturally. Rest your arms alongside your body with your palms facing upward. Close your eyes and allow your breathing to return to its natural, unforced rhythm. Release deliberate muscular effort throughout your body.
- Why it helps: Gives your heart rate and blood pressure time to settle and lets your body integrate the movements you just completed.
- Modification: If lying flat causes discomfort or pulling in your lower back, bend your knees, place your feet flat on the floor wider than your hips, and let your knees rest inward against each other.
Poses and Practices Beginners Should Avoid
A safe home practice relies just as much on knowing what not to do. Advanced yoga involves significant joint compression and extreme spinal ranges of motion that require years of preparation and direct hands-on instruction.
According to safety guidelines from the NCCIH, beginners should avoid the following at home:
- Headstands and Shoulder Stands (Inversions): Placing substantial body weight on the cervical spine (neck) poses risks of disc herniation, muscle strains, or nerve compression. Avoid unassisted headstands or shoulder stands.
- Full Lotus Pose (Padmasana): Forcing your legs into a tight cross-legged bind requires extreme external rotation at the hip joints. If the hips lack this mobility, torque shifts directly into the knee ligaments, raising the risk of meniscus injury.
- Forceful or Rapid Breathing (Kapalabhati / Breath of Fire): Hyperventilating or forcing breath retentions can lead to lightheadedness, dizziness, fainting, or spikes in blood pressure. Stick to slow, rhythmic diaphragmatic breathing.
- Extreme Backbends (Full Wheel Pose): Deep backward extensions place high mechanical loads on the lumbar vertebrae and wrist joints without developed shoulder and thoracic mobility.
Common Beginner Mistakes and How to Fix Them
Practicing without an in-person teacher means you must act as your own observer. Watch out for these common habits:
| Common Mistake | The Risk | The Safer Approach |
|---|---|---|
| Pushing through pain | Soft-tissue tears, joint strain, or chronic inflammation. | Stop immediately when you feel sharp, pinching, or throbbing sensations. |
| Holding your breath during exertion | Elevates blood pressure and induces muscle tension. | Inhale and exhale smoothly. If you cannot breathe, ease out of the pose. |
| Copying social media “ideal” shapes | Attempting poses suited for different skeletal anatomies. | Focus on foundational alignment and use props to adapt to your body. |
| Skipping warmups or ending abruptly | Jarring cold muscles or leaving your body in an agitated state. | Spend 2 minutes centering at start and 2 minutes resting at the end. |
| Practicing on rugs or slippery socks | Slipping during lunges or downward dog, causing sudden falls. | Use a nonslip rubber or TPE mat on firm, uncarpeted flooring barefoot. |
Special Considerations: When to Seek Professional Guidance
Yoga is generally considered a safe form of physical activity for healthy people when performed properly under qualified supervision, but individual health factors alter the equation.
Review these considerations before beginning:
- Pre-existing Medical Conditions: If you have severe spinal disc disease, glaucoma, uncontrolled high blood pressure, balance disorders, or advanced osteoarthritis, consult your physician before attempting home yoga routines. Specific poses—like sustained inversions for glaucoma patients—are contraindicated.
- Pregnancy: Pregnant individuals need specialized modifications to accommodate shifts in their center of gravity and joint laxity caused by hormonal changes. Importantly, NCCIH guidance cautions that hot yoga must be avoided during pregnancy due to the risk of maternal hyperthermia (overheating).
- Older Adults: Aging joints and reduced bone mineral density mean gentler transitions, balance supports (such as a sturdy wall or chair), and slower joint loading are necessary to minimize fall risks.
- Instructor Guidance: When possible, take an introductory class or workshop from an experienced, certified yoga teacher, or use structured beginner video series from accredited institutions. Practicing entirely alone from day one without feedback carries an increased risk of injury, as noted in the NCCIH tips on yoga.
Progressing Your Practice at Home
There is no scientifically proven “ideal” schedule for yoga practice. You do not need to practice seven days a week or hold poses for precise minute counts to see benefits. Clinical trials evaluated by the NCCIH utilize widely varying frequencies and durations, meaning the best schedule is the one you can maintain comfortably.
To build consistency safely:
- Prioritize Frequency Over Duration: Three brief 15-minute sessions per week build familiar movement patterns far better than a single, exhausting 60-minute session every two weeks.
- Master the Basics First: Resist the urge to add complex variations until your joints feel completely comfortable in foundational positions like Mountain Pose, Cat-Cow, and supported lunges.
- Progress One Variable at a Time: If you want to expand your practice, either add 5 minutes to your total session duration or introduce one new pose. Do not double your practice length and try five unfamiliar positions on the same day.
Frequently Asked Questions
What equipment do I actually need to start yoga at home?
You do not strictly need commercial props. A nonslip floor space and comfortable clothing that allows movement are the only necessities. A standard yoga mat improves comfort and traction, while thick books can substitute for yoga blocks, and a folded bath towel can replace a specialized yoga blanket.
How often should a beginner do yoga?
Current scientific research does not define a single mandatory weekly frequency for yoga. Starting with two or three 10-to-20-minute sessions per week is a reasonable, manageable schedule that lets your joints, tendons, and muscles adapt without overtraining.
Can beginners do yoga using a chair?
Yes. Chair yoga is an established, practical method for practicing postures, breathing exercises, and mobility work without getting down onto the floor. It is especially beneficial for individuals with limited joint mobility, balance concerns, or acute pain flare-ups.
When should I stop or exit a yoga pose?
Exit a pose immediately if you feel sharp, shooting, or stabbing pain, joint pinching, numbness, tingling, lightheadedness, or sudden shortness of breath. A gentle, dull muscular stretch is normal; pain in joints, tendons, or your spine is a clear signal to stop.
Taking Your First Step
The simplest way to start is to clear a small area of floor space, set a timer for 10 minutes, and move through the first three poses of the gentle beginner sequence: seated breathing, Cat-Cow, and Child’s Pose. Keep your breath natural, pay attention to how your back and hips feel, and let consistency—not complexity—drive your practice.