
Core Exercises for Beginners: A Safe, Practical Guide to Building Trunk Stability
Estimated reading time: 7 minutes
Key Takeaways:
- The core functions as a muscular cylinder connecting the upper and lower body, not just visible abdominal muscles.
- A complete beginner routine requires four foundational movements: dead bug, bird dog, glute bridge, and modified side plank.
- Effective bracing relies on proportional stiffness and continuous breathing, rather than sucking the stomach in or bearing down forcefully.
- Dedicated floor stability training is practical for building baseline motor control, but everyday activities and general exercise offer comparable long-term benefits.
Table of Contents:
If you want to build a stronger midsection at home, skip the endless crunches. Effective core exercises for beginners focus on teaching the trunk muscles to stabilize the spine and resist unwanted movement while your arms and legs are in motion.
A well-rounded starting routine does not require special equipment or extreme fatigue. By practicing four foundational movements—the dead bug, the bird dog, the glute bridge, and the modified side plank—you can develop balanced strength, improve coordination, and protect your lower back without straining your neck or spine.
What “The Core” Actually Means
Popular fitness culture often treats the core as synonymous with visible abdominal muscles. In biomechanics, your core is much broader. It functions as a muscular cylinder that connects your upper and lower body.
This system includes:
- The front: The rectus abdominis and the deeper transversus abdominis.
- The sides: The internal and external obliques.
- The back: The erector spinae and smaller stabilizing muscles along the vertebrae, such as the multifidus.
- The base and top: The pelvic floor muscles below and the diaphragm above.
- The hips and pelvis: The gluteal muscles and hip flexors, which anchor the trunk to the lower extremities.
No single exercise isolates or “switches on” just one of these muscles. They work together as an integrated unit. When you lift a grocery bag, carry a child, or push open a heavy door, your trunk muscles stiffen naturally to transfer power between your limbs and keep your torso steady. Beginner training should mirror that functional role.
The 4 Foundational Core Exercises
This routine covers the primary jobs of the trunk: resisting extension (arching backward), resisting rotation (twisting), extending the hips safely, and resisting lateral flexion (bending sideways).
Begin with one set of each movement. Choose a rep range you can perform smoothly without shaking or losing control, resting as needed between sets.
1. The Dead Bug (Heel-Slide Variation)
The dead bug trains your abdominal wall to prevent your lower back from overarching while your legs move.
Starting Position (Supine)
   O   <- Head supported on floor
  /|\  <- Arms reaching toward ceiling
  / \  <- Knees bent, feet flat on the floor
How to Do It:
- Lie on your back with your knees bent and your feet flat on the floor.
- Reach both arms straight up toward the ceiling.
- Gently engage your midsection so your lower back rests comfortably against the floor. Do not forcefully flatten your spine into the mat; find a relaxed, supported contact.
- While breathing out smoothly, slowly slide your right heel along the floor away from your body until your leg is nearly straight.
- Inhale as you slide the right heel back to the starting point.
- Repeat with the left leg.
- Technique cue: Imagine balancing a glass of water on your lower belly. Your pelvis should not tilt or rock as your leg extends.
- Progression: Once heel slides feel steady and easy, bring your knees up into a tabletop position (hips and knees bent at 90 degrees, feet off the floor). Slowly lower your right arm overhead while extending your left leg straight out just above the floor, then return and switch sides. Only use this variation if your lower back does not lift off the mat.
2. The Bird Dog
The bird dog builds stability across the back of the body, challenging the shoulders, glutes, and spinal extensors while keeping the pelvis level.
Starting Position (Quadruped)
     _O_   <- Hands under shoulders
    / | \
   |  |  | <- Knees under hips
  /   |   \
How to Do It:
- Start on all fours with your hands directly beneath your shoulders and your knees directly beneath your hips.
- Keep your neck long by looking down at the mat slightly in front of your hands.
- Keeping your torso quiet, slowly slide your right foot backward and lift the leg until it aligns with your torso. Focus on squeezing your right glute rather than kicking as high as possible.
- If your balance is steady, simultaneously reach your left arm straight forward at shoulder height with your thumb pointing up.
- Hold for one to two seconds, return your hand and knee to the floor with control, and repeat on the opposite side.
- Regressed option: If extending an arm and a leg at the same time causes your hips to twist, keep both hands on the floor and only extend one leg at a time.
- Technique cue: Do not let your lower back sag toward the floor when your leg extends. Keep your midsection firm as if you were balancing a shallow tray across your lower back.
3. The Glute Bridge
While often considered a lower-body lift, the glute bridge is a vital core exercise. It teaches the glutes and hamstrings to extend the hips while the abdominal wall stabilizes the front of the pelvis.
How to Do It:
- Lie on your back with your knees bent, feet flat on the floor roughly hip-width apart, and heels placed a few inches from your hips.
- Rest your arms along your sides, palms facing down.
- Press through your heels and squeeze your glutes to raise your hips until your thighs and torso form a straight, comfortable diagonal line.
- Pause at the top for one to two seconds, keeping your ribcage drawn down rather than flared open.
- Slowly lower your hips back to the floor.
- Common fault: Pushing the hips too high. Hyperextending the lower back at the top shifts the work away from your glutes and places unnecessary stress on the lumbar spine. Stop lifting when your hips are level with your knees and shoulders.
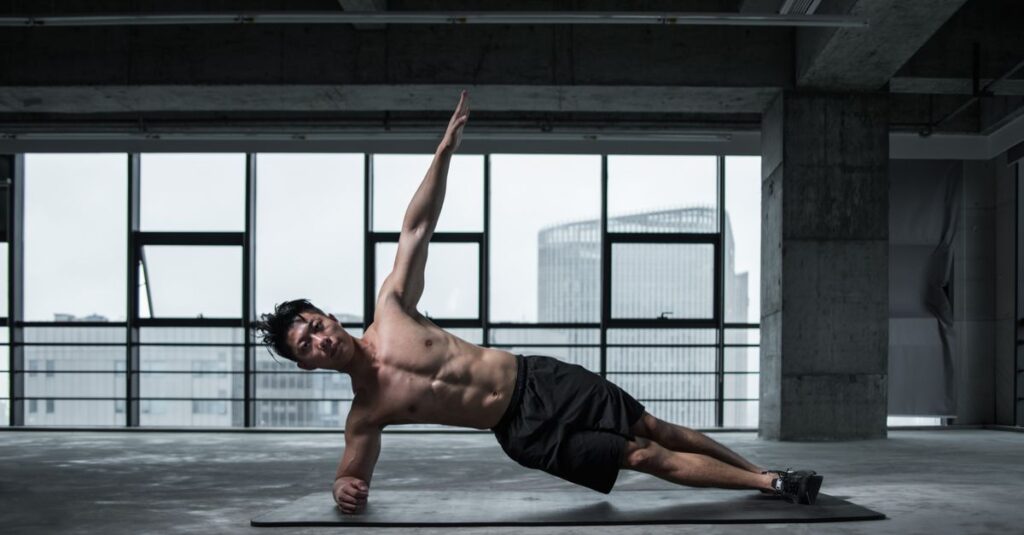
4. The Modified Side Plank
The side plank targets the obliques, the quadratus lumborum (a deep back muscle), and the hip abductors along the outside of the pelvis. The modified version shortens the lever arm, making it accessible for beginners.
Modified Position (Knees Bent)
       O  <- Head neutral
      /|  <- Top arm resting along torso
  ===/=== <- Torso and thighs aligned
    / \   <- Knees bent 90 degrees on floor
How to Do It:
- Lie on your side with your knees bent at roughly a 90-degree angle, stacking your legs and feet.
- Place your bottom elbow directly beneath your shoulder, forearm flat on the mat pointing forward.
- Press down through your forearm and bottom knee to lift your hips off the floor.
- Create a straight line from your head down through your shoulders, hips, and knees.
- Hold this position for 5 to 15 seconds while breathing steadily, then lower your hips with control. Turn over and repeat on the other side.
- Regressed option: If lifting your hips causes shoulder or neck tension, lie in the setup position and focus simply on pressing your forearm into the floor to keep your chest open and your shoulder away from your ear without lifting the pelvis.
- Technique cue: Do not let your top shoulder roll forward toward the floor. Keep your chest facing straight ahead.
How to Brace Without Holding Your Breath
Many beginners are told to “brace your core” without an explanation of what that means. Consequently, people often suck their stomachs in as hard as possible or hold their breath until their face turns red.
Neither approach is useful. Sucking the stomach in (hollowing) reduces the stability around the spine, while clenching every muscle at maximum intensity creates unnecessary strain. A review in the Journal of Orthopaedic & Sports Physical Therapy cautions that excessive muscular co-contraction increases spinal compression and restricts natural movement, which can be counterproductive—particularly for people dealing with existing back pain and muscle guarding.
Instead of maximum clenching, aim for proportional stiffness:
- The belt cue: Imagine wearing a wide leather belt. Gently expand your midsection outward against that belt by 15% to 20%. You should feel firm tension around your stomach, flanks, and lower back.
- The breath check: If you cannot carry on a conversation or breathe out slowly while holding an exercise, you are bracing too hard. Inhale through your nose into your ribcage and belly, and let your breath flow evenly throughout every repetition.
Dosage, Rest, and How to Progress
Because fitness levels vary widely, there is no universal set-and-rep formula that works for every beginner. Some people feel fatigue after five controlled repetitions, while others need ten or twelve to feel challenged.
Use the following framework to guide your early sessions:
| Movement | Starting Target | When to Progress |
|---|---|---|
| Dead Bug | 5 to 8 slides per side | When you can complete 10 reps per side without your lower back arching. |
| Bird Dog | 4 to 6 extensions per side | When you can hold each side for 3 seconds without wobbling. |
| Glute Bridge | 8 to 10 smooth reps | When you can pause for 2 full seconds at the top for 12 reps. |
| Modified Side Plank | 2 to 3 holds of 10 seconds per side | When you can hold the position comfortably for 30 continuous seconds. |
The Progression Ladder
In physical rehabilitation settings, stability training often progresses systematically: individuals start in supported, floor-based positions (supine), transition to all-fours (quadruped), and eventually advance to kneeling, standing, and dynamic whole-body movement, as described in research on rehabilitation exercise progression.
While you do not need to follow a rigid clinical protocol for general fitness, that framework provides a helpful mental model. Master basic floor control before attempting complex standing cable rotations or hanging leg raises.
When an exercise becomes comfortable, change only one variable at a time:
- Increase time under tension: Slow your movement down. Take three seconds to extend your leg in a bird dog and two seconds to lower it.
- Increase volume: Add two to three repetitions per set, or add a second set.
- Lengthen the lever: Move from the modified side plank (knees bent) to a full side plank (legs straight, balancing on feet and forearm).
Progress should always be determined by the quality of your movement, not by whether your muscles are burning or shaking uncontrollably.
4 Common Beginner Mistakes
1. Expecting Core Exercises to Burn Belly Fat
Spot reduction is a persistent myth. Performing trunk stability exercises will strengthen the underlying musculature, improve posture, and make daily lifting tasks easier, but it will not selectively burn fat from your midsection. Fat loss occurs across the whole body through an overall energy deficit, not through localized muscle contractions.
2. Forcing a Completely Rigid “Neutral” Spine
Beginners often become anxious about keeping their spine in a mathematically perfect position. Your spine naturally has gentle inward curves at the neck and lower back, and an outward curve at the mid-back. Aim for a comfortable, stable position rather than freezing your spine like a block of concrete. If an exercise feels pinch-like or unnatural, adjust your pelvis slightly until the movement feels smooth.
3. Progressing to Long Planks Too Soon
Holding a sloppy two-minute plank with sagging hips and a strained neck does very little for trunk stability. If your shoulder blades wing out, your lower back arches, and your hips drop toward the floor, your muscles have stopped controlling the position. Multiple short holds (such as three 10-second holds with brief rests) yield better movement quality than one long, deteriorated hold.
4. Overlooking Everyday Movement
You do not need to spend 45 minutes every day doing floor work. General physical activity—walking, climbing stairs, carrying items, and basic bodyweight squats—naturally engages the trunk. Dedicated core exercises simply teach you how to organize that tension so you can move safely in daily life.
What the Research Says About Core Training
Core training is frequently marketed as a cure-all for back pain and poor athletic performance. However, clinical research paints a more measured picture.
A comprehensive systematic review in BMC Musculoskeletal Disorders evaluated whether motor control and stabilization exercises were more effective for low-back pain than other forms of active exercise. The researchers found that while stabilization routines help reduce symptoms, they do not show clear long-term superiority over other types of active exercise, such as general strength training or aerobic movement.
Similarly, a meta-analysis published in PLOS ONE reported that core stability training produced significant short-term reductions in pain compared to general exercise in patients with chronic low-back pain, but those differences largely disappeared in longer-term follow-ups.
Furthermore, as noted in the review on stability and motor control, clinical trials evaluate vastly different exercise protocols across diverse populations, making it difficult to declare any single exercise program superior to all others.
The takeaway for beginners: Core-specific training is a practical, low-barrier way to build motor control, body awareness, and baseline endurance. However, it is not a magical fix, nor is it the only way to build a resilient midsection. If you prefer brisk walking, swimming, or full-body resistance training, those activities also provide substantial benefits for your trunk and back.
Safety and Red Flags
Muscle fatigue and mild effort are normal responses to exercise. Sharp, shooting, or radiating sensations are not.
Modify or stop an exercise immediately if you experience:
- Sharp or sudden pain in the spine, hips, or shoulders.
- Numbness, tingling, or “pins and needles” traveling down your legs or arms.
- Pain that worsens as you continue repeating the movement.
Note: This guide is intended for general educational purposes and does not substitute for individualized medical evaluation. If you have a history of spinal disc injury, persistent back pain, recent surgery, or are pregnant, consult a physical therapist or qualified physician before beginning a new exercise program.
Frequently Asked Questions
How often should beginners train their core?
Two to three sessions per week is plenty for most beginners. This frequency gives your muscles adequate time to recover between workouts while providing enough stimulus for your nervous system to adapt to new movement patterns.
Can I do these core exercises every day?
Gentle floor movements like heel slides, bird dogs, and glute bridges can be done frequently because they place very low mechanical stress on the joints. However, your muscles need recovery to grow stronger. Training hard every single day is unnecessary and can lead to fatigue-related technique breakdowns.
What should I do if an exercise causes lower back discomfort?
First, check your setup. If your back arches during a dead bug, shorten the range of motion by sliding your foot halfway instead of all the way out. If your back feels strained during a bird dog, keep your leg lower to the ground. If reducing the range of motion or adjusting your brace does not resolve the discomfort, remove that exercise from your routine and consult a professional.
Do traditional planks strengthen the entire core?
Standard front planks work the anterior core—primarily the rectus abdominis and transversus abdominis—along with the shoulders. However, they do not emphasize lateral stability (the obliques and hip abductors) or hip extension (the glutes) as effectively as modified side planks and glute bridges do. A balanced routine incorporates variations that challenge the trunk from multiple directions.
Your Next Step
Do not worry about completing multiple sets or timing your holds with a stopwatch right away.
For your first session, roll out a comfortable mat, run through three to five controlled repetitions of each of the four exercises, and pay attention to how your breathing feels during each movement. Once those patterns feel smooth and natural, you can gradually add repetitions week by week.