
How to Master the Dead Bug Exercise for Core Stability and Control
Estimated Reading Time: 6 minutes
Key Takeaways
- The dead bug is an anti-extension exercise designed to build torso stability without loading the spine heavily.
- Moving opposite limbs (contralateral control) mirrors essential everyday movement patterns like walking and running.
- Maintaining an unmoving trunk and avoiding lower back arching is critical to performing the movement effectively.
- Progression relies on increasing lever length and slowing down tempo rather than adding external weights.
Table of Contents
- Introduction
- What the Dead Bug Exercise Actually Trains
- How to Do the Dead Bug with Proper Form
- Repetitions, Sets, and How to Count Them
- Four Common Form Mistakes to Avoid
- How to Regress or Progress the Movement
- Dead Bug vs. Bird Dog vs. Plank: Choosing the Right Tool
- Safety, Pain, and Individual Differences
- How to Add the Dead Bug to Your Workout
- Frequently Asked Questions
Introduction
If you have ever tried to lower your leg during an abdominal exercise only to feel your lower back peel off the floor and take the brunt of the strain, you already understand why the dead bug exercise exists.
The dead bug is a floor-based movement where you lie on your back and slowly lower opposite limbs—one arm overhead, the opposite leg toward the floor—while keeping your torso steady. Rather than bending or twisting your spine like a crunch or sit-up, your torso works as a stable anchor. The goal is to resist movement in your midsection while your arms and legs move freely around it.
It looks simple from the outside, which leads many people to rush through it or lower their limbs farther than their abdominal control allows. When done with attention to detail, however, it serves as an effective way to train coordination, abdominal bracing, and pelvic control without placing heavy compressive loads on the spine.
What the Dead Bug Exercise Actually Trains
The core is not a single muscle. It is a collective group of muscles—including the rectus abdominis, the internal and external obliques, the transverse abdominis, and the deeper spinal stabilizers—that work together to stabilize the trunk and transfer force between the upper and lower body.
During the dead bug, your limbs act as long levers. When you extend your right arm overhead and reach your left heel toward the floor, gravity pulls those limbs downward. That leverage creates an extension force across your spine and tilts your pelvis forward (an anterior pelvic tilt). To prevent your pelvis from tipping and your lower back from hyperextending, your abdominal muscles must fire continuously.
This type of muscular work is known as anti-extension. Instead of contracting muscles to produce joint movement, your trunk muscles work to resist unwanted movement.
Separating Science from Fitness Hype
Because the dead bug feels demanding on the midsection, it is often surrounded by exaggerated claims. It is helpful to know what the exercise does well and where its limitations lie:
- What it does well: According to both the National Academy of Sports Medicine (NASM) and Harvard Health Publishing, the dead bug trains trunk and pelvic control while your extremities move. It teaches contralateral coordination (moving opposite arm and leg together), which mirrors functional patterns like walking, running, and climbing stairs.
- What it does not do: It is not a maximal strength builder. It will not build heavy lifting power in the way a heavy barbell squat or loaded carry does. Nor is it a stand-alone cure for back pain or a magic fix for posture.
- The research on balance and rehab: A small 2024 study published in the International Journal of Health Sciences and Research looked at dead bug exercises and dynamic balance. However, the available research record provides limited detail regarding sample sizes, comparison groups, and long-term outcomes. Sweeping claims that the dead bug prevents injury or outperforms other core exercises across the board are not supported by the current evidence. It is a reliable, low-load tool for teaching core bracing, but it remains one tool among many.
How to Do the Dead Bug with Proper Form
Before you begin, find an exercise mat or a firm, comfortable surface. Clear enough space overhead and below your feet so your limbs can reach outward without hitting furniture.
       [Arms pointing straight up]
                 |   |
              ( o _ o )  <- Head relaxed on mat
             /|       |\
            / | Trunk | \
              | steady|
             /         \
   [Thighs vertical]   [Knees bent 90°]
         |                   |
       (90°)               (90°)
         |                   |
       [Shins parallel to floor]
Step 1: Establish the Starting Position
Lie flat on your back. Raise your arms so they point straight up toward the ceiling, directly above your shoulders. Lift your feet off the floor and bend your hips and knees to roughly 90-degree angles. Your thighs should be vertical and your shins should be roughly parallel to the floor—a position commonly called “tabletop.”
Step 2: Set Your Trunk and Find Your Breath
Allow your head, shoulders, and ribs to settle onto the mat. Gently brace your abdominal wall, similar to how you might prepare if someone were about to tap your stomach.
Avoid the temptation to forcefully tilt your pelvis and mash your lower back flat into the floor with maximum effort. You want a steady, supported spine where your lower back maintains a natural, comfortable relationship with the floor without lifting or overarching. Most importantly: take a normal breath in and out. If you have to hold your breath to feel stable, your brace is too rigid.
Step 3: Lower Opposite Limbs with Control
Inhale softly, then as you exhale, slowly lower your right arm backward overhead while extending your left leg straight out toward the floor.
Move deliberately. Lower your arm and leg only as far as you can while keeping your torso quiet and your pelvis motionless. You do not need to touch the floor. Stop the movement the instant you feel your lower back start to arch, your ribs flare outward, or your hips wobble.
Step 4: Return and Alternate
Pause for a brief moment at the end of your controlled range of motion. Use your core and hip muscles to draw your right arm and left leg back to the starting tabletop position.
Reset your balance for a second, then repeat the motion on the other side: extend your left arm overhead while reaching your right leg outward.
Repetitions, Sets, and How to Count Them
In fitness literature, rep counting for alternating movements can be confusing. To be clear: one repetition equals one complete cycle (lowering the right arm/left leg, then lowering the left arm/right leg). If an instruction says “8 repetitions per side,” that means 16 total limb extensions.
| Training Level | Sets | Repetitions | Rest Interval | Focus |
|---|---|---|---|---|
| Beginner | 1–2 sets | 4–6 reps per side (8–12 total reaches) | As long as needed to breathe smoothly | Range of motion control, continuous breathing, zero spinal arching |
| Intermediate | 2–3 sets | 8–10 reps per side | 45–60 seconds | Extending the limbs closer to the floor with full pelvic stability |
| Advanced | 3 sets | 10–12 reps per side | 45–60 seconds | Slower eccentric tempo (3 seconds down, 2 seconds up) |
Recommendations from authoritative fitness organizations reflect this progressive approach:
- Harvard Health Publishing suggests starting with 8 to 12 alternating movements per set, adding one or two more sets after resting.
- NASM lists up to 3 sets of 10 to 15 repetitions per side in its general exercise library, which serves as a target as your endurance develops.
- Healthline’s exercise guidance recommends working within a practical range of 1 to 3 sets of 5 to 12 repetitions per side based on your current physical ability.
Rest as long as you need to recover regular breathing between sets. Because this exercise is about precision, performing reps while fatigued usually results in poor movement patterns and back strain.
Four Common Form Mistakes to Avoid
The dead bug looks deceptively easy, leading many people to make simple technique errors that reduce its effectiveness or cause lower-back discomfort.
1. Allowing the Lower Back to Arch
This is the most frequent technical flaw noted by both NASM and Harvard Health. As your leg extends, the weight of the limb pulls on your pelvis. If your deep stabilizers relax, your pelvis tilts forward and your lower back arches high off the mat. If someone can easily slide a thick foam roller under your lower back while your leg is extended, you have moved past your functional range of control. Shorten how far your leg travels so your spine remains stable.
2. Moving Too Fast or Relying on Momentum
Pumping your arms and legs back and forth like you are pedaling an upside-down bicycle defeats the purpose of the exercise. Fast movement relies on elastic recoil and momentum rather than muscular control. Every repetition should take three to four seconds to complete: two seconds to extend outward, a brief pause to own the position, and one to two seconds to return.
3. Holding Your Breath
Many people lock their diaphragm and hold their breath to create artificial stability in their midsection. While a brief breath-hold (the Valsalva maneuver) is useful when lifting a near-maximal barbell, it is unnecessary and counterproductive during endurance-based motor-control drills. As Harvard Health emphasizes, you should breathe steadily throughout the exercise. Practice exhaling smoothly as your limbs extend outward and inhaling as they draw back to center.
4. Over-Flattening the Spine
While letting your back arch is a mistake, aggressively tucking your pelvis to smash your lumbar spine into the floor with maximum force can create excessive spinal flexion and hip flexor tension. The goal is a neutral, stable spine—retaining the spine’s natural, gentle curves while preventing unwanted shifts, twists, or excessive arching as your limbs move.
How to Regress or Progress the Movement
Depending on your mobility, strength, and movement history, the standard dead bug may feel either frustratingly difficult or insufficiently challenging. Adjusting the length of the lever arms allows you to find the right entry point.
Easier Variations (Regressions)
If your back arches immediately or you struggle to coordinate opposite limbs, scale back the lever length or reduce the number of moving parts.
Regressions:
1. Tap-down: Knees stay bent at 90°, tap heel to floor.
2. Arms only: Feet flat on floor, alternate reaching arms overhead.
3. Legs only: Hands stay pointing up, alternate extending legs.
4. Seated variation: Sit tall in a firm chair, lift knee and opposite arm.
- Heel Taps (Shorter Leg Lever): Instead of extending your knee and reaching your leg straight out, keep your knee bent at a 90-degree angle the entire time. Simply hinge at your hip and lightly tap your heel to the floor before returning to tabletop. This shortens the lever arm, significantly reducing the strain on your lower back.
- Isolate One Half (Arms Only or Legs Only): Keep both feet flat on the floor with your knees bent. Practice extending just one arm overhead at a time while keeping your torso still. Alternatively, keep both arms pointing toward the ceiling and move only one leg at a time.
- The Supported Seated Variation: For individuals who find it difficult to get down onto or up from the floor, Harvard Health describes a seated version. Sit upright on a stable, armless chair with your feet flat on the floor and your spine tall. Slowly lift your right knee a few inches while raising your left arm overhead, lower both with control, and repeat on the opposite side.
Challenging Variations (Progressions)
Once you can perform 3 sets of 10 standard repetitions per side with good control, normal breathing, and no lower-back arching, you can gradually increase the difficulty as supported by Healthline:
- Lengthen the Lever: Ensure your moving knee fully straightens as your heel travels toward the floor, hovering just an inch or two above the ground before returning.
- Tempo Control: Slow the movement down to an eccentric tempo of 3 to 4 seconds on the way out, hold the fully extended position for 2 full seconds while maintaining smooth breathing, and take 2 seconds to return.
- Maintain Static Tension: While the working arm and leg extend, maintain strict vertical alignment with the resting arm and knee. Do not let the resting knee drift toward your chest to make the exercise easier; keep it locked at 90 degrees directly over your hip.
Note on Resistance: You may see social media videos featuring people wearing heavy ankle weights or holding dumbbells during dead bugs. Adding external load is rarely necessary for the majority of trainees and often degrades form. Master bodyweight control and tempo before considering external resistance.
Dead Bug vs. Bird Dog vs. Plank: Choosing the Right Tool
Core exercises differ in how they load the body and which positions they challenge. Understanding how the dead bug compares to other common core movements helps you program it effectively.
Dead Bug vs. Bird Dog vs. Plank:
- Dead Bug: Supine (on back). Challenges anti-extension with limb movement. Gentle on wrists/shoulders.
- Bird Dog: Quadruped (hands and knees). Challenges anti-rotation and posterior chain (glutes/back).
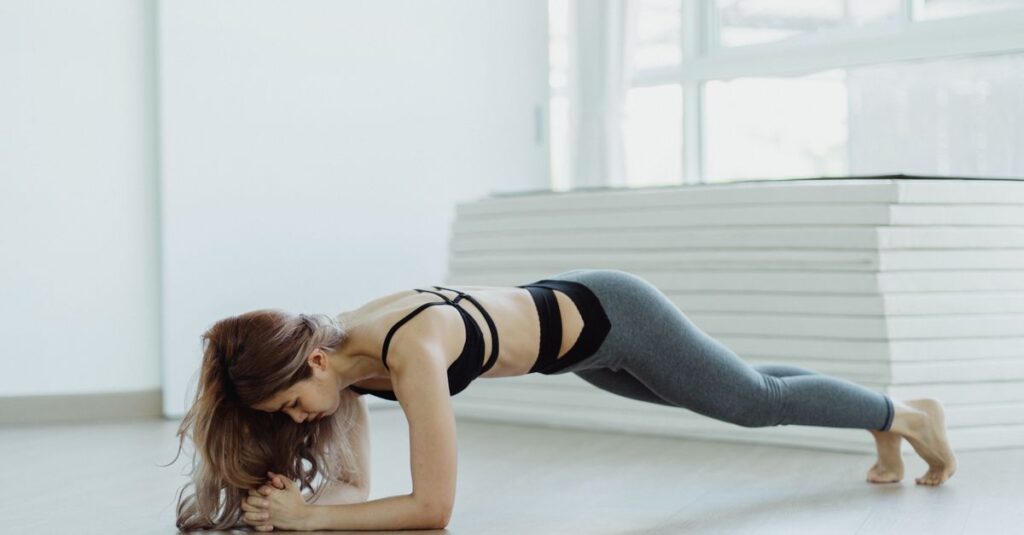
- Front Plank: Prone (forearms and toes). Static anti-extension hold; higher whole-body isometric demand.
The Dead Bug
- Position: Supine (lying on your back).
- Primary Demand: Anti-extension with dynamic extremity movement.
- Best Used For: Anyone learning abdominal bracing; individuals who need tactile feedback from the floor to feel what their spine is doing; those who experience wrist, shoulder, or neck pain in planks or quadruped positions.
The Bird Dog
- Position: Quadruped (on hands and knees).
- Primary Demand: Anti-rotation and anti-extension, with an added emphasis on the posterior chain (glutes, hamstrings, and upper back).
- Best Used For: Pairing with the dead bug to balance anterior (front) and posterior (back) trunk control; individuals who want to train hip extension and shoulder stability simultaneously.
The Front Plank
- Position: Prone (suspended on forearms and toes).
- Primary Demand: High-threshold static anti-extension.
- Best Used For: Building total-body isometric tension. However, because it is a static hold, it does not challenge coordination or independent limb movement in the way a dead bug does. It can also place higher stress on the shoulders, wrists, and lower back if fatigue sets in.
Safety, Pain, and Individual Differences
Because the dead bug takes place on your back on a supported surface, it avoids placing significant axial (compressive) load on the spine. This makes it a popular option in general fitness and active recovery routines.
However, individual differences matter:
- Never Push Through Sharp Pain: If extending your leg triggers sharp, shooting, or pinching pain in your lower back or hip, stop immediately. Try reducing your range of motion or switching to bent-knee heel taps. If the discomfort persists, discontinue the exercise and consult a licensed physical therapist or healthcare provider.
- Spine Anatomy Varies: There is no single spine position that fits every human body. While an excessive arch should be avoided during the dead bug, people with different pelvic anatomy, hip mobility, and spinal curvature will rest against the floor slightly differently. Focus on maintaining a comfortable, braced, and unchanging trunk position rather than forcing your spine into an extreme shape.
- Special Considerations: Trainees recovering from recent abdominal or spinal surgery, those in mid-to-late pregnancy, or individuals with diastasis recti should seek guidance from a qualified health professional before including supine core exercises in their routine.
How to Add the Dead Bug to Your Workout
To get the most out of the dead bug, incorporate it into your routine where it best serves your goals:
- During Your Warm-up: Performing 2 sets of 6 to 8 repetitions per side at the end of your dynamic warm-up can help prime your abdominal stabilizers before you move on to squats, deadlifts, overhead presses, or running.
- In a Core-Specific Circuit: Pair the dead bug with a posterior-focused exercise (such as the bird dog or a glute bridge) and a mobility drill. This trains your midsection through different planes of motion without accumulating excessive fatigue in a single muscle group.
Start with a modest volume: select a variation where you can comfortably complete 2 sets of 6 controlled repetitions per side with normal breathing. Once you can consistently maintain pelvic stability across those sets, gradually increase your repetitions or expand your range of motion.
Frequently Asked Questions
Why is it called the dead bug exercise?
The exercise earns its name because the starting posture—lying on your back with arms raised and knees bent in the air—visually resembles a bug lying upside down on its back.
Is the dead bug better than standard crunches?
The dead bug serves a different purpose than crunches. While crunches focus on flexing the spine to work the superficial abdominal muscles, the dead bug focuses on anti-extension and pelvic stability, teaching your trunk to resist unwanted motion while keeping compressive stress off the spine.
Should my lower back be completely flat on the floor?
Rather than forcefully smashing your lower back down with maximal effort, aim for a natural, supported, and neutral position. Your spine should maintain its gentle natural curve, but it should not peel upward or arch excessively as your limbs extend outward.
What should I do if my hip pops or clicks during leg extension?
Hip clicking or snapping is often related to the hip flexor tendon gliding over the pelvis. If it is painless, simply decrease your range of motion or try the heel-tap regression. If the clicking is accompanied by pinching, sharp sensation, or pain, discontinue the exercise and consult a physical therapist.